Bare-Minimum-Sealed-Crawlspace
Bare Minimum Sealed Crawlspace
Crawlspaces have become a source of confusion for consumers. Let us end that.
What are the minimum requirements for a vented crawlspace? Vented.
Most brand new homes with a vented crawlspace have black 6mil vapor barrier overlapped to cover all of the ground, although you can easily pull it back, and it is obvious that it doesn’t keep moisture down or control pest infestation. In fact, almost always the black vapor barrier in a vented crawlspace is a habitat provider as it is most often installed, allowing for tunnels and puddles of water…. The access door has a size requirement but can be leaky. Lastly, although the building code is clear about how many vents you need they are often operable and end up closed because people have problems or stuck open, or wide open for pests. The code does not address mold or performance over time. The enforcement of crawlspace cleanliness, grading, and specifics of how the vapor barrier is installed is all over the place. Not good. The minimum requirements differ based on where you build. Vented crawlspaces problems seem to get worst over time. Once a home is built in NC with a vented crawlspace it begins going through annual cycles of excessive humidity / dryness and temperature swings. The result is often that a home becomes wet enough to cause trouble during the early spring and stays wet enough until late fall/early winter. At some point in time growth gets dry, brittle and then dormant. This cycle weakens wood over time, making it more absorbent… Also, over time people replace HVAC equipment and ductwork which makes colder air more efficiently with less leakage. While that sounds good, it can throw a crawlspace out of balance: Your old ducts might leak enough to dry out the air in the crawlspace during the summer, replacing the ducts or even having them sealed, can mean robbing your crawlspace of that unintentional drying, and you will save money. Unless you do something else specifically to reduce the moisture impact. It doesn’t take long inside a vented crawlspace to find evidence of moisture, mold, mildew, fungus, pollen, dust or critters.
So let us assume sealing the vents and attempting to control the space is worthwhile.
It helps to know the NC Closed Crawlspace Building Code. LINK
Our “Bare Minimum Sealed Crawlspace” exceeds the minimum code in various ways, but includes the simplest and most economical options among all the options. Our minimum has many benefits even the priciest system doesn’t offer.
All crawlspaces are unique but we have about 9-10 steps:
1) Fully Illuminate the work-space. This is generally a strand or more of construction lights, with low-wattage LEDs that serve a safety purpose and are not at all fragile, they often come-unplugged if you tug on it the wrong way.
2) Stop bulk moisture intrusion, and fix plumbing leaks.(not generally included or needed, but we are going to help and be reasonable about it)
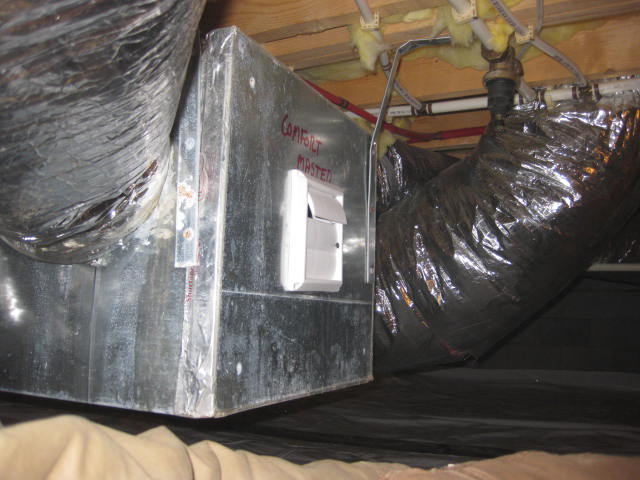
3) Air-seal the floor-plane. Air-Seal the Ducts.
4) Clean-Up, Rake-Smooth the surface of the ground, prepare for vapor barrier. (Moving large quantities of dirt displaced by previous water-proofing endeavors is generally not included and is extra.)
5) Seal The Wall and Floors with various methods. Solex, Expanding Foam, Bag-Method.
6) Install a drying device, of the 4 options we prefer Supply-Air.
7) Install a device to monitor the performance, we prefer one that shows the occupant in real-time what is going on in the crawlspace.
8) Adjust the door, weatherstrip and insulate the door. Create barriers between porch foundations and the main crawlspace.
9) Label everything important in the crawlspace, install charts, signage and flags to alert visitors, install padding and extra layers to entrance / high traffic areas.
10) Customer walk-through or photo-documentation.
OTHER ASPECTS OF CLOSING OR SEALING A CRAWLSPACE:
– Sometimes a sealed crawlspace is a great “band-aid” for the symptoms of bad water-proofing or lot-design. There should really be nothing but hard moderately dry, sturdy, packed, dirt under the plastic in a crawlspace. Mud is not a building material. Mud should not be tolerated in crawlspaces or under the footprint of a building. Gravel is also problematic as it punctures and smooshes.
– There is nothing stopping residents from plugging their vents, but residents should learn to use a temperature and humidity monitor and understand our charts about humidity, before closing their vents.
– Here at Stetten Home Services we tend to believe that any crawlspace without a Temperature and Humidity Monitor is a bad idea. For about $25 dollars you can own an AcuRite Wireless Indoor & Outdoor Temperature and Relative Humidity Monitor with interior back-lit display. The “outdoor” readings would thus actually be “crawlspace readings”. All crawlspaces need a sensor and the best place to put it is not in the center, not along the perimeter, but somewhere between to get an “average” reading. The elevation of the remote sensor should be just below the floor system or a little higher. We want to know if the wooden structure is wet, the “highest strata”. You also want the device to be easy to find given it requires annual batteries. Flag it or make a sign like we do if your are DIY.
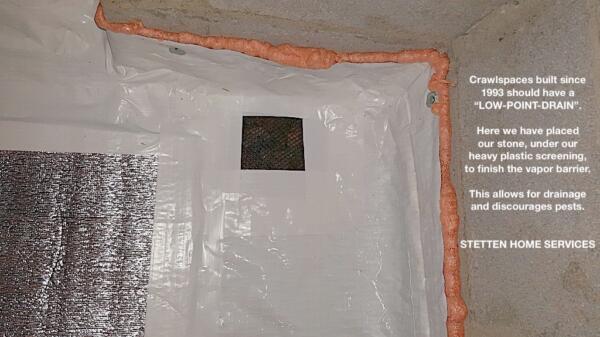
– A clean, navigable, well-lit crawlspace is crucial. If there is liquid moisture or wet-earth, get the moisture out, even if it means shoveling the dirt into bins and hauling it away. The resulting surface of only compacted or virgin soils is ideal for conveyance of moisture to a low-point drain or sump-pump. The main purpose for an interior drain or even the vapor barrier itself is to convey liquid from pipe burst or other leaks to the low-point drain, without wetting the dry soils, in the crawlspace. For this reason, special effort has to be made so that the seams overlap properly, yes, your vapor barrier should be properly shingled unless it is taped, even in a vented crawlspace. Building code mandates crawlspace vents unless a sealed crawlspace is installed, but even the vented crawlspaces often have “operable” vents that can be opened or closed. For this reason, we see no problem with plugging the vents with Insulated Plugs that can be taken out easily to re-ventilate with outside air again. If there is duct-work in the crawlspace, it may be leaking enough air down there to keep the space dry. Our question is: Why not have a dry, comfortable, accessible, well-lit crawlspace?

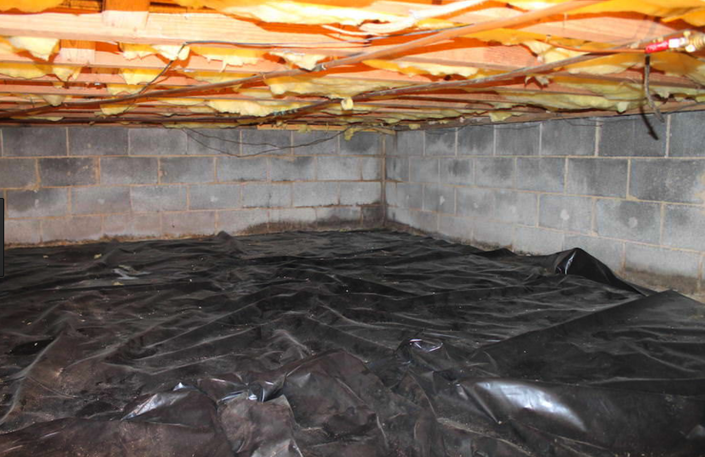
The above photo depicts a Typical VAPOR BARRIER done to meet the minimum standard. This installation meets the building code for sealed crawlspaces also.
Given the above photo, what difference would simply plugging the vents cause? It would make all the difference actually. The ambient temperature and humidity has the biggest impact.
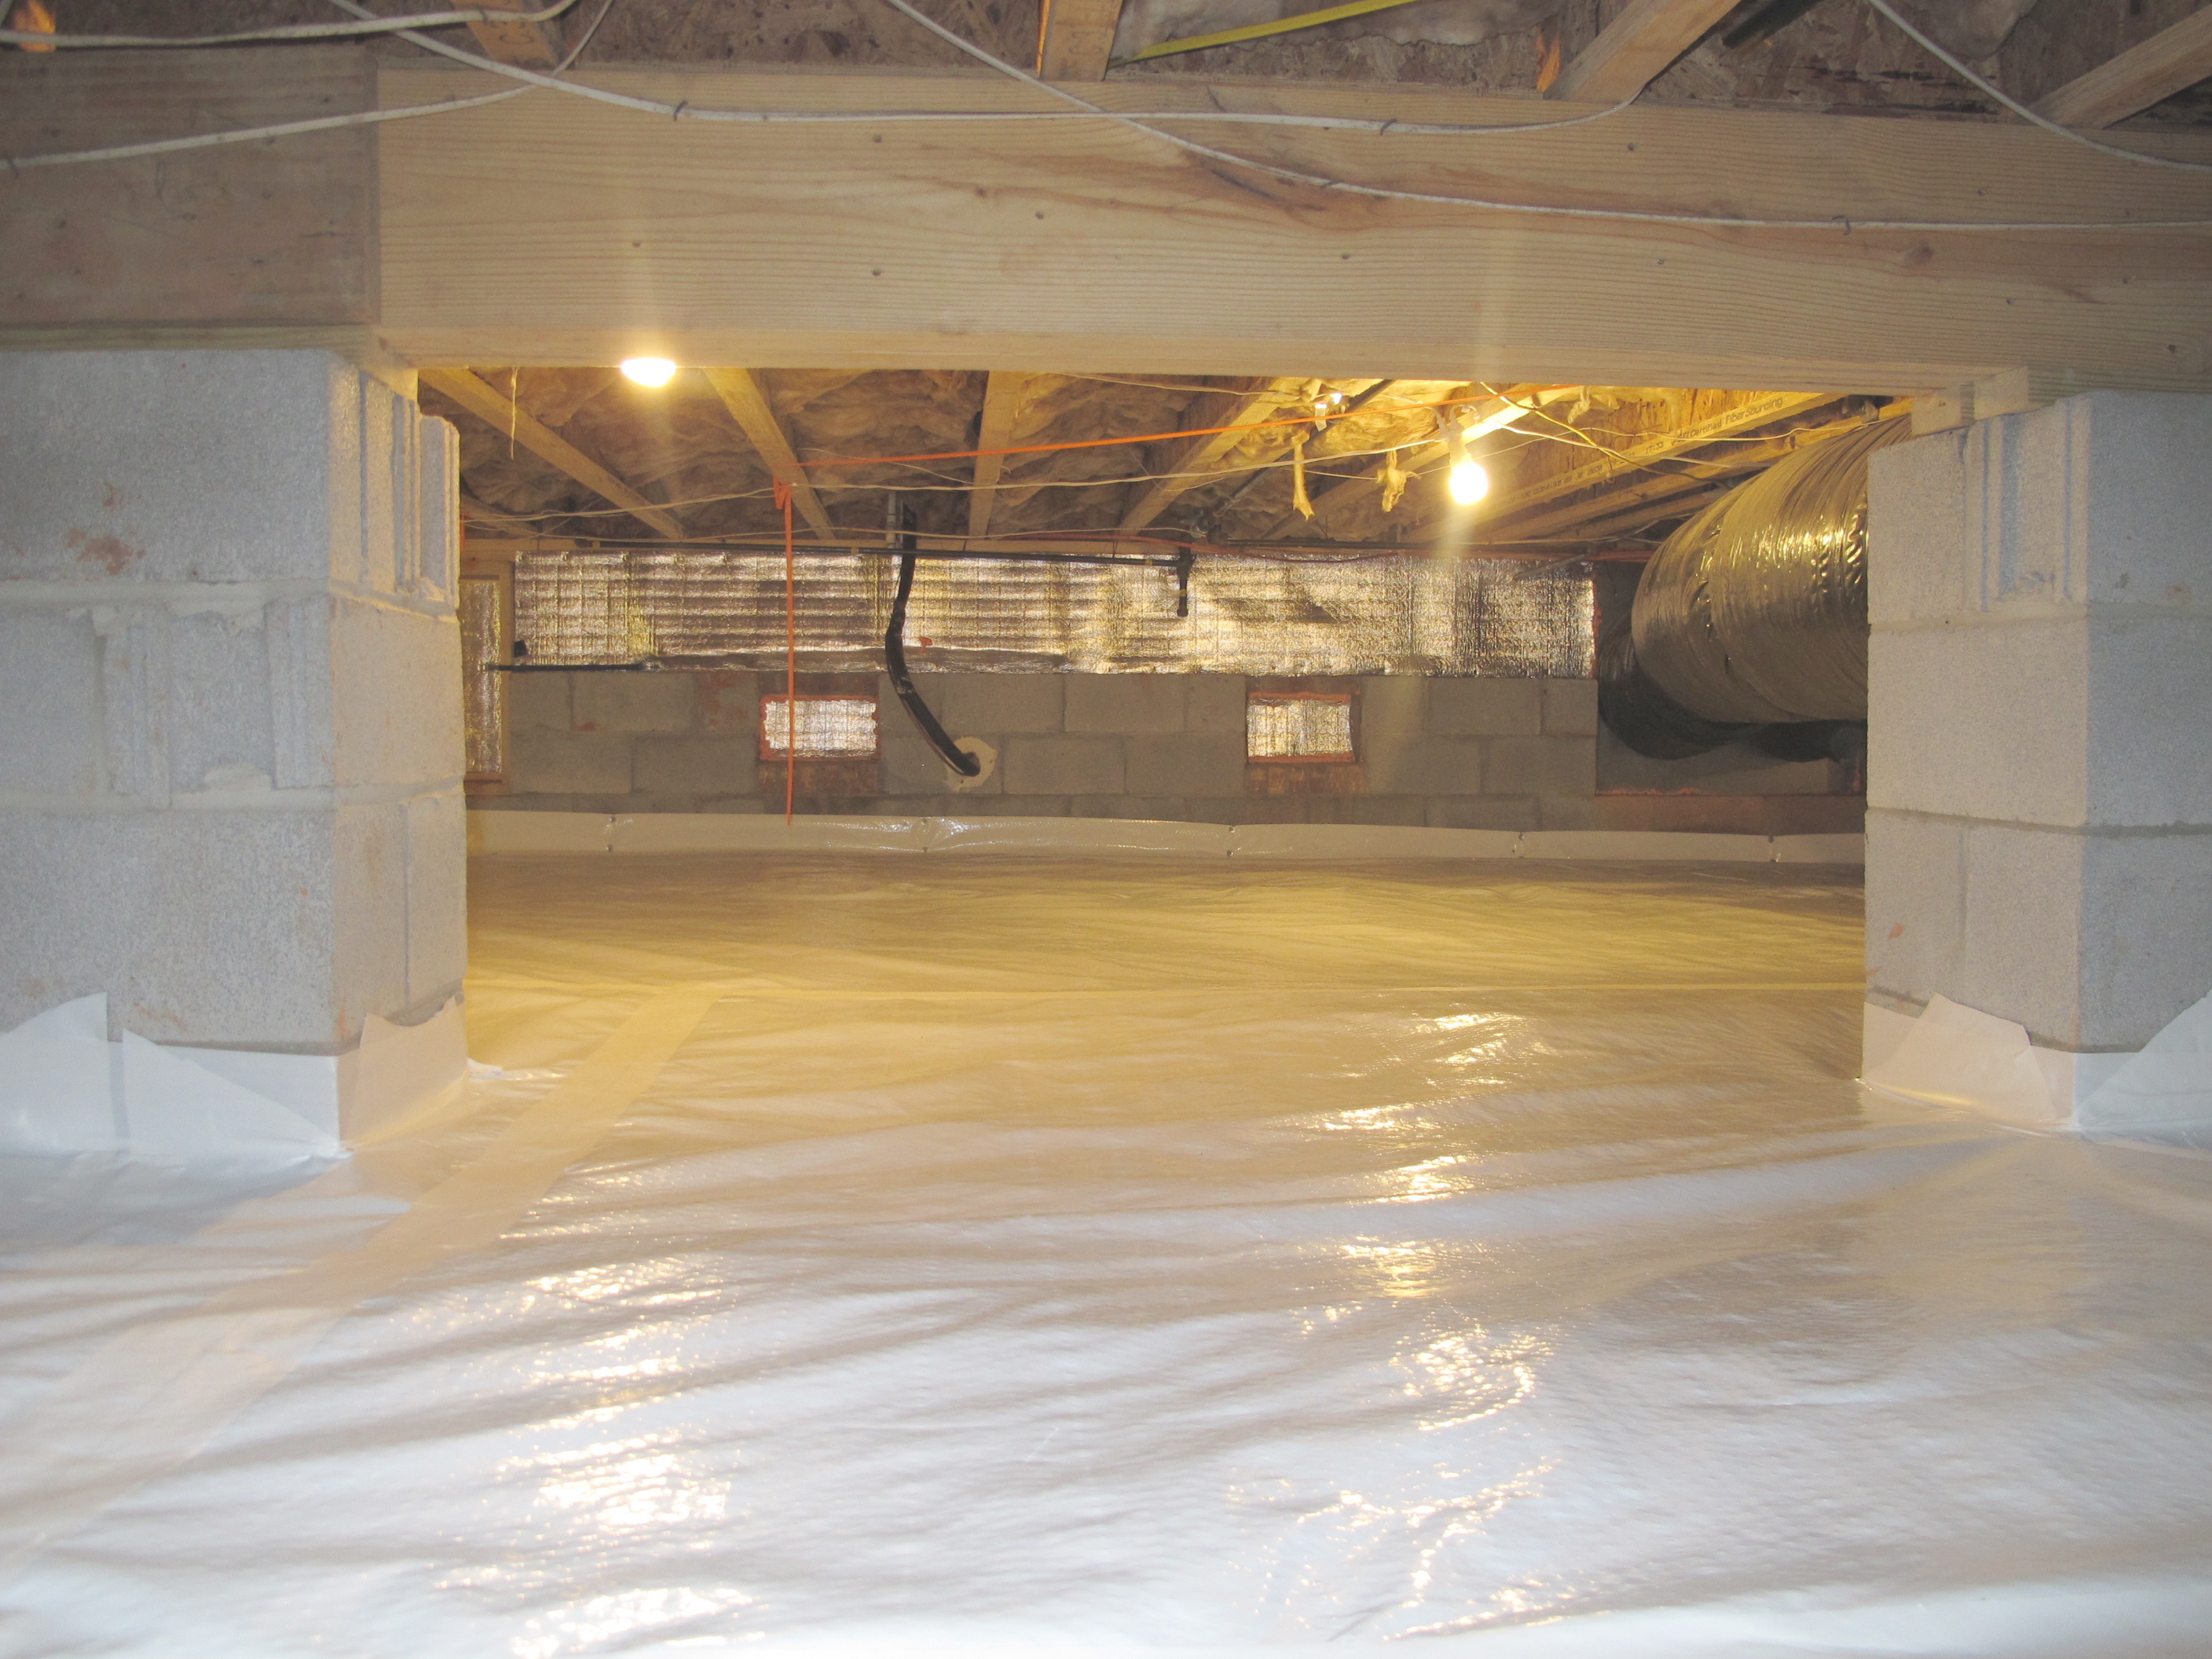
The above photo depicts our SEALED VAPOR BARRIER
Once you have a sealed vapor barrier it is okay to have wetness under the plastic. Within months or days the ground under the vapor barrier will start to become stable with respect to soil saturation.
So, when asked if a crawlspace is “right” or “wrong”, I often ask a series of questions, and run into a dead end. Generally nobody has done the most obvious thing; Install a Humidity Monitor. Rather than a fancy data logger, our monitors allow the user to see the real time crawlspace conditions from the inside. So to answer this question; “Is my crawlspace done right? or “Is my sealed-crawlspace done right?” I answer, with questions.
Is your crawlspace dry?
Is your crawlspace more comfortable than the ambient environment? (On average of course)
Is your crawlspace clean, well lit, and easily navigable?
Most crawlspaces are disgusting and you will be surprised how much you can see by simply peering in the vents with a powerful flashlight. We have even employed remote control crawlspace video rovers to get into un reachable spaces.
With a little effort we can exclude the ambient humidity and temperature swings from affecting your home’s temperature, moisture levels, and energy consumption.
Vented crawlspaces are often more humid than the ambient conditions in the summer, and they can tend to lag behind on winter days when the ambient temps rise. Closing vents can offer lots of benefits, but if water is getting inside and getting trapped in the “island soils” then with a sealed crawlspace this moisture will get trapped in the crawlspace air, and you can have a horrible situation. Knowledge is power. A monitor is a cheap way to quantify the issue. You do not want to install a dehumidifier or use the existing HVAC equipment to dry out the ground or the city you live in.
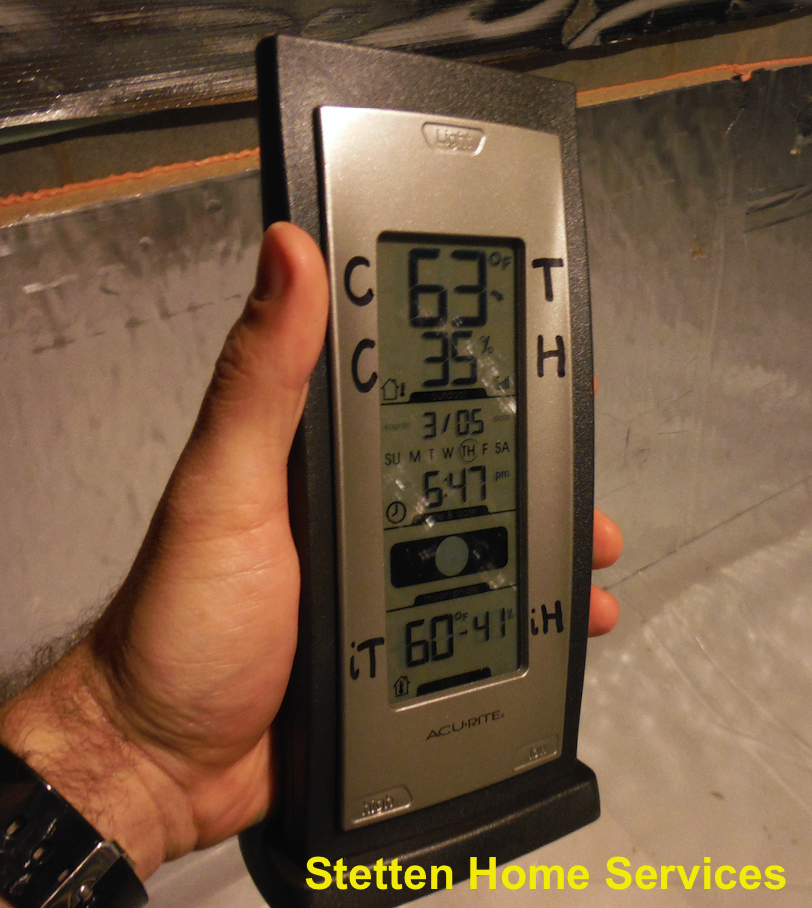
Of course none of these devices are specifically made for crawlspaces, so “outdoor” = “crawlspace”.
It will become really useful to either print and retain this chart or commit the numbers to memory if you will be sealing your vents and taking on that responsibility.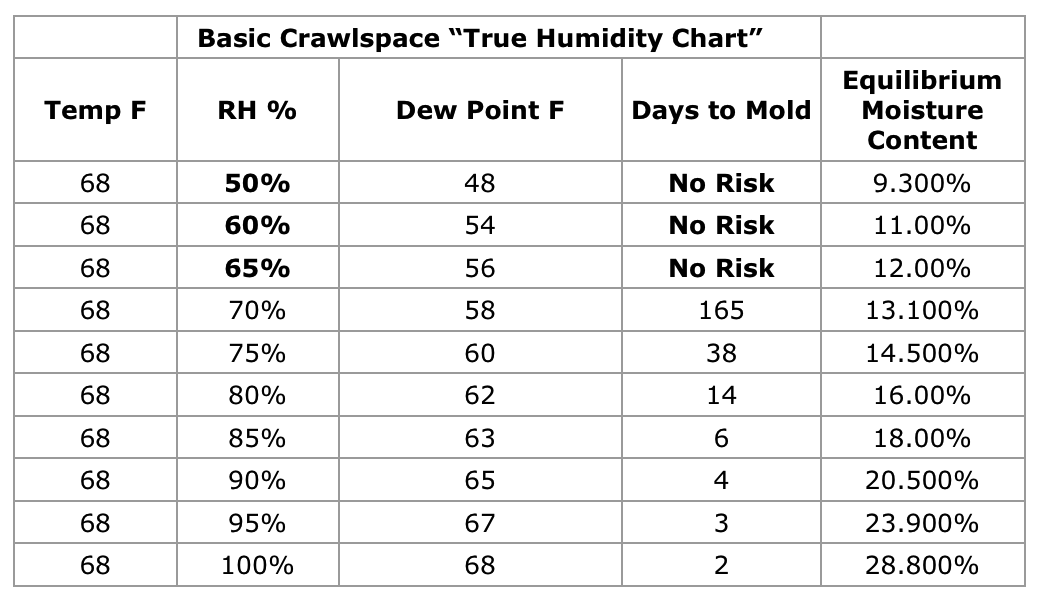
One of the most important aspects of a sealed crawlspace, especially if your crawlspace had/has “topical biologicals” is floor system air-sealing.
To learn more about our crawlspace lighting, see the following post: Lights, Camera, Action
Floor System Insulation Strategies – There are many different options, learn more. Even in sealed crawlspaces,
sometimes the best place for insulation is against the floor of the home.