Attic Ventilation
Hello Folks,
I am sorry you are thinking about your attic, if you weren’t planning on thinking about it, and you now are, I am doubly sorry.
I will start by stating that ideally attic spaces would be completely controlled spaces, for example, Attics can actually have:
– Comfortable temperature and humidity year round- Excellent Lighting throughout with logically placed illuminated switches
– Excellent accessibility with no tripping hazards or or head-bangers
– No bugs and functional shelving for storage
– and provide easy access to wires, pipes, ducts, etc

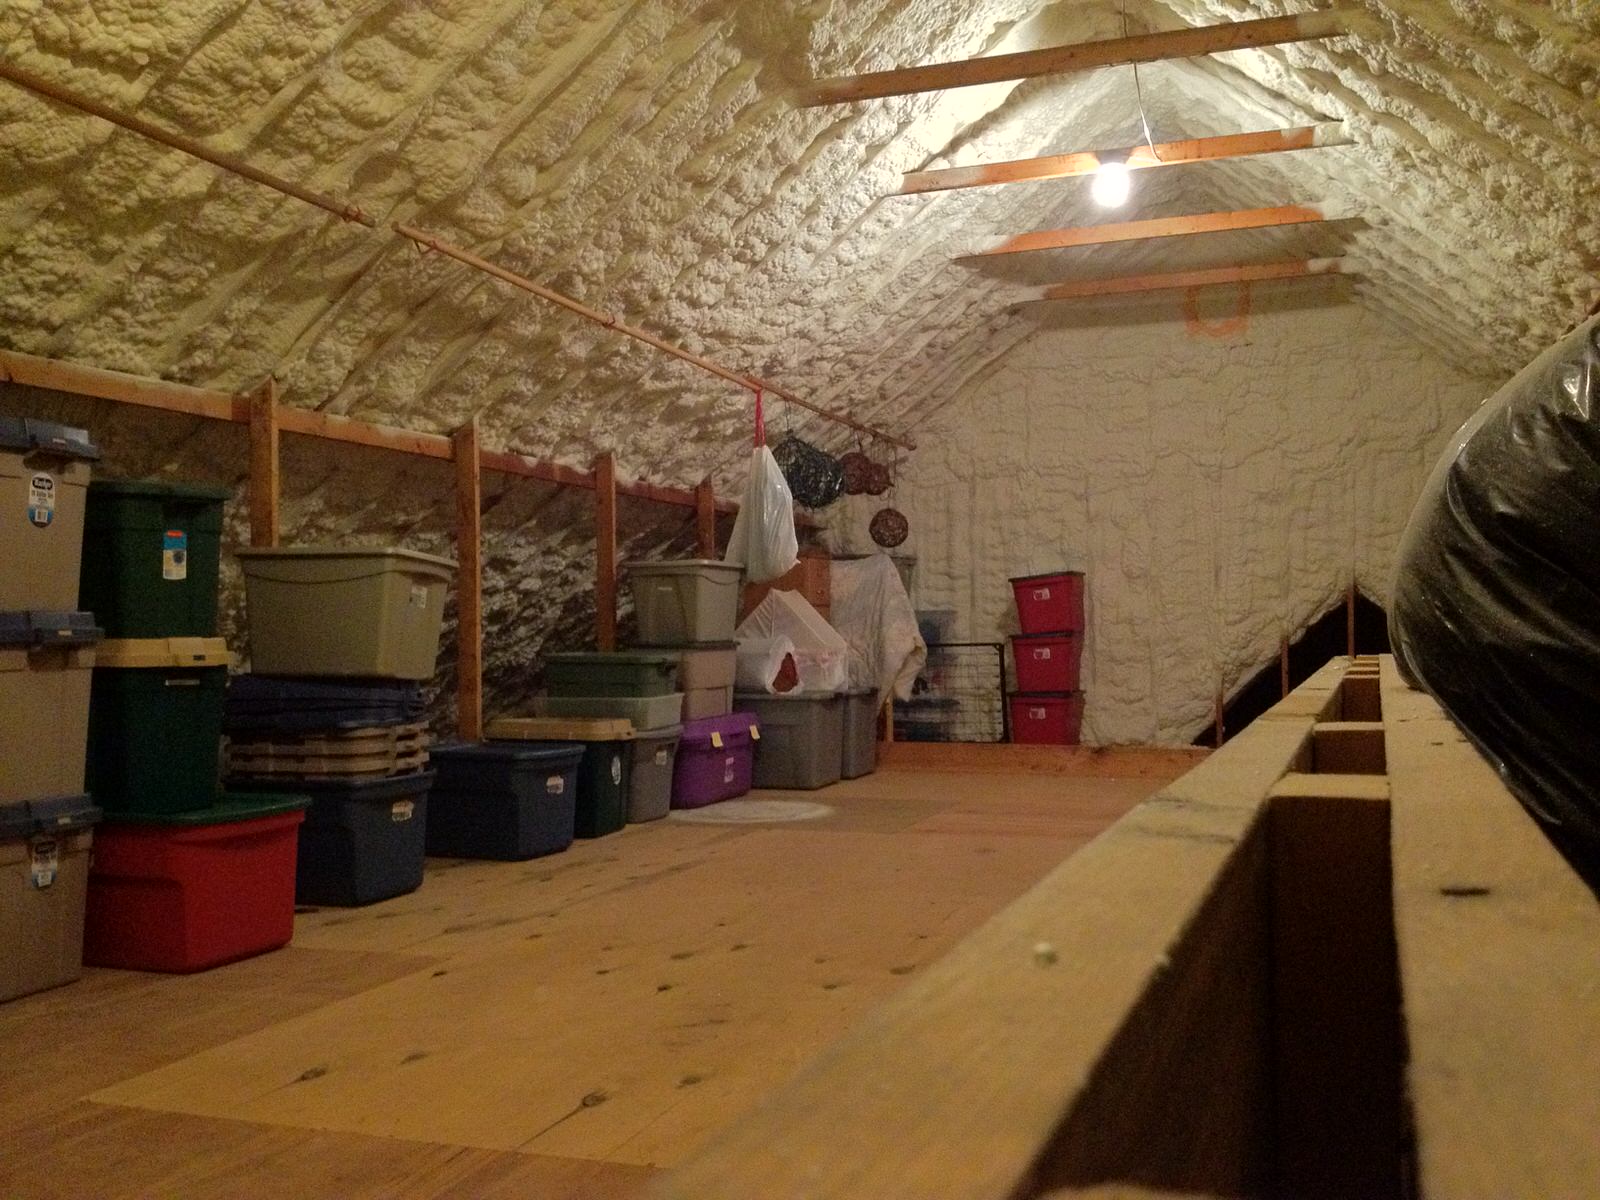
The above photo shows an example of a pretty good attic. The only thing that could be better would be even more lighting and a window on each side. You can notice an orange ring at the top of the gable end wall. This is where the Powered Attic Ventilator Fan used to be. During the installation of the foam we were running that fan, and we continued to run it for several days while the foam cured, and the smell was exhausted. You can see in the picture a large circular white stain(by the purple storage bin) where a mushroom of foam was sprayed so that it could be later be scraped up, trimmed, and used to plug the PAV hole. If ever needed, this plug can be popped out, the home can be ventilated, and then the plug can be replaced/re-sealed with can-foam. Along with the addition of a sealed crawlspace this home’s energy bills were reduced by almost 50%. There are times during the year where one of this home’s HVAC systems can be left OFF while the other heats or cools the whole home. In other words, the capacity of the 2 HVAC systems is greatly over-sized given the work we’ve done. This whole project was over $12,000 and included removal of all of the old insulation, various floor and ceiling air-sealing details, and upgrades to the bathroom ventilation systems.
If this expense is not in your budget, or your attic is never going to be “this useful”, your best bet might be traditional attic weatherization with proper attic ventilation. Attics under low-pitch roofs, or attics full of trusses make spray-foam less rewarding than folks with huge, wide-open volumes. What do you stand to gain if you “gain complete control” of your attic space(s)? If you think you need to do something about the (hostile)conditions in your attic, then there are lots of different strategies for passive ventilation and a few different ways to incorporate “active ventilation”.
If you have not completed Attic Air-Sealing, Insulation, Crawlspace Air-Sealing, Crawlspace Insulation, or duct-sealing/replacement, then those scopes of work are likely to provide you more benefit per dollar spent than any project narrowly focused on Attic Ventilation.

“GABLE” Powered Attic Ventilator.

There are 5 more on the other side
(presumably). 10 Penetrations is plenty!

I mean no offense to the American manufacturer, but this
is not the most pleasant looking ventilation strategy.
Photo Credit: Ross MFG.
Some of the world’s most prominent and adored building scientists have gone out of their way to protest against Powered Attic Ventilator Fans (to the extent that they write articles about their “dangers and problems”, and even lobby heavily to get them “banned” as they have been in Georgia) It appears these naysayers provide little to no useful help for the interested consumers that flood to their blogs. They often say that if your attic is well-sealed and well-insulated you shouldn’t care how hot your attic gets. They ignore the fact that real people have real valuables in their attics, and occasionally at a minimum, real people need to access their attics when the conditions are sweltering and very much dangerous to people who aren’t used to temperatures in the 130’s to 160 degrees. In attic ventilation labs people aren’t working, storing items, and no HVAC systems and duct-work are factored into their tests. If you are still reading, for your purposes, all the research is old, outdated, and unrealistically framed AGAINST POWERED ATTIC VENTILATORS.
I imagine people notice how much their A/C works, how hot their attics get, how destroyed some belonging became after just one summer, and then go to the web in search for solutions. Unfortunately they often find a lot of information about what not to do from sources who fail to admit that each home, and each person is unique. The truth is, that your only option might be Powered Attic Ventilation if you have a narrow town-home, your home is built with no gables (hip-roofed) or your builder was a moron(opted for ridge-vent even though gable vents could have been installed).
Lesson # 1 – Gable Venting is Great! You can pack a whole lot of “Free Area for Venting” into properly designed gables. If you are designing a house, try to incorporate gables as opposed to hips, which expands the available usable attic space, and affords the use of gable venting. Also, I encourage larger overhangs, like 2′ – 3′ so you can be aggressive with your gable venting, with less risk of water intrusion.
Lesson # 2 – Large Overhangs are great! Large overhangs afford more space for intake venting so use it up; Soffit and Eave venting should be maximized. It drives me bonkers when I see a 1′ overhang with tiny little 1″ or 2″ strips of eave venting or those stupid intermittent vents every few feet, let alone when I see 2′ or 3′ overhangs with minimal intake venting. Always apply some thought and planning to maximize intake venting. If you have 2′ overhangs you can afford to put your bath-fan exhaust into it, and other devices, and it won’t hurt your overall venting performance or require unnecessary roof penetrations.
Lesson # 3 – Minimize Roof Penetrations! This lesson would seem “off topic” but there are attic ventilation strategies that require an exorbitant number of holes in the roof. This is unacceptable. When designing/building a home to last, try to install the fewest number of roofing penetrations as possible. It may be possible to have zero roofing penetrations. Ask your plumber if there is a way to vent the plumbing another way, and try to simplify your roof design. If you are convinced that PAVs are evil, then you should probably have generous gables with generous overhangs so you don’t end up with a home that looks like an attic testing facility.
Lesson # 4 – Higher pitch is a good thing. … kinda. Homes are big inter-tangled systems, and every design choice is chosen for a reason, and sometimes certain choices have consequences elsewhere in the design. If you are going to have a vented attic, then you are essentially granting yourself access to the ceiling from above. If you have a vented attic that is 3/12 or 4/12 you aren’t really leaving yourself or your workmen much space and you might be better off just having vaulted ceilings and no attic space, or 6/12 even though it may cost a bit more. When you make any space really difficult to navigate the quality or work in that space plummets. I would venture to say that a 6/12 pitch should be the minimum, and 12/12 should be the maximum. If you have a really steep roof it becomes difficult to hire folks to work on it, and they will be likely to install walk-boards and 2×4’s all over the roof just do to a minor repair. This may eliminate the value of reducing the number of roof penetrations because people are going to be popping new holes in it just to clean your gutter, for example. In a vented attic, the verticality of it aids in the process of hot air rising, and the added volume can serve to dilute moisture and heat that might be building up. If the pitch is too low in an attic it seems you are always working in your own shadow, where if there is more vertical space, and lights are up high, the light can shine down on more of the ceiling plane, resulting in a better space.
Lesson # 5 – Arm yourself with REAL-TIME TEMPERATURE and HUMIDITY READINGS. You can read until your eyes fall apart about building science, and any of the data you’ll see with have been captured with data loggers. In real-life, people don’t want, need, or have the ability to use data-loggers. You can see some examples of Wireless Temperature and Humidity Sensors with Interior Base-Stations HERE. Before you invest hundreds or thousands on anything your best 1st step is to start watching and learning. One of the cool things that these devices do is tell you the interior temperature and humidity, so you don’t just learn what your crawlspace or attic is doing, but also how well you HVAC system is doing at controlling your indoor humidity. I have installed hundreds of these things in houses and I am probably near the limit of what I can learn from them now, but I love getting into conversations with my clients about their situations. I have a few clients where we put 4 sensors like so: A) Against the ceiling drywall B) Under the attic insulation C) Above the attic insulation, D) Under the roof deck. To put that into perspective, we were able to determine how the attic thermal boundary and the attic ventilation systems were performing very quickly.
Lesson # 6 – Watch out for bad Radiant Barrier applications. If you have a dark roof and excellent ventilation you may still have lots of radiant energy streaming into the attic space that really can’t be dealt with by increasing the ventilation. Sometimes people suggest radiant barriers are the answer, and often their product is a thin, fragile application of foil, or even slivers of tin foil blown over the insulation. This is where I tighten up. I do not think any radiant barrier installation that is “thin”, like foil or paper can provide enough savings to make up for the fact that you can no longer see the roof, the rafters, or the ceiling below it, and often it is just plain worthless after foot traffic has been applied. If the material is about 1/4″ thick and can be at least semi-rigid then it might be able to provide a some R-Value, air-sealing properties, or may an air-channel for heat to rise towards the vents. If you install the radiant barrier against the building envelope’s exterior side, life on the back side of an attic wall, then you can reduce lots of thermal bridging, and encapsulate the insulation and make a big change.
[nggallery id=247]